Amazon WorkSpaces Tutorial: Learn how to Launch a Virtual Desktop
Amazon WorkSpaces is a powerful tool and you will learn how to provision a virtual desktop
First of all, with Amazon WorkSpaces Tutorial, you can launch a Virtual Desktop as well as provision virtual, cloud-based Microsoft Windows or Amazon Linux desktops for your users, known as WorkSpaces.

In addition, Amazon WorkSpaces Tutorial allows you can use to build your modern application in the AWS Cloud.
How does Amazon WorkSpaces works?
Moreover, Amazon WorkSpaces uses a directory to store and manage information for your WorkSpaces and users. You can do any of the following:
- Create a Simple AD directory.
- Create an AWS Directory Service for Microsoft Active Directory, also known as AWS Managed Microsoft AD.
- Connect to an existing Microsoft Active Directory by using Active Directory Connector.
- Create a trust relationship between your AWS Managed Microsoft AD directory and your on-premises domain.
Amazon WorkSpaces Tutorial
Launch a WorkSpace Using AWS Managed Microsoft AD
In addition, Amazon WorkSpaces uses directories to store and manage information for your WorkSpaces and users. For example, for your directory, you can choose from Simple AD, AD Connector, or AWS Directory Service for Microsoft Active Directory, also known as AWS Managed Microsoft AD. In addition, you can establish a trust relationship between your AWS Managed Microsoft AD directory and your on-premises domain.
Amazon WorkSpaces Tutorial
Step 1: Create an AWS Managed Microsoft AD Directory
First of all, create an AWS Managed Microsoft AD directory. AWS Directory Service creates two directory servers, one in each of the private subnets of your VPC. Note that there are no users in the directory initially. You will add a user in the next step when you launch the WorkSpace.
To create an AWS Managed Microsoft AD directory
- First of all, open the Amazon WorkSpaces console at https://console.aws.amazon.com/workspaces/.
- Secondly, in the navigation pane, choose Directories.
- Choose Set up Directory, Create Microsoft AD.
- For example, configure the directory as follows:
- For Organization name, for instance, enter a unique organization name for your directory (for example, my-demo-directory). Moreover, this name must be at least four characters in length, consist of only alphanumeric characters and hyphens (-), and begin or end with a character other than a hyphen.
- For instance, the Directory DNS, enter the fully-qualified name for the directory (for example, workspaces.demo.com).
- And, moreover, for NetBIOS name, enter a short name for the directory (for example, workspaces).
- For Admin password and Confirm password, enter a password for the directory administrator account. For more information about the password requirements, see Create Your AWS Managed Microsoft AD Directory in the AWS Directory Service Administration Guide.
- (Optional) For the Description, enter a description for the directory.
- In addition, within VPC, select the VPC that you created.
- For Subnets, select the two private subnets (with the CIDR blocks
10.0.1.0/24and10.0.2.0/24). - Choose Next Step.
- Select Create Microsoft AD.
- Choose Done. The initial status of the directory is
Creating. When directory creation is complete, the status isActive.
Step 2: Create a WorkSpace
Now that you have created an AWS Managed Microsoft AD directory, you are ready to create a WorkSpace.
To create a WorkSpace
- Open the Amazon WorkSpaces console at https://console.aws.amazon.com/workspaces/.
- In the navigation pane, choose WorkSpaces.
- Choose Launch WorkSpaces.
- On the Select a Directory page, choose the directory that you created, and then choose Next Step. Amazon WorkSpaces registers your directory.
- On the Identify Users page, add a new user to your directory as follows:
- Complete Username, First Name, Last Name, and Email. Use an email address that you have access to.
- Choose Create Users.
- Choose Next Step.
- When there, on the Select Bundle page, select a bundle and then choose Next Step.
- On the WorkSpaces Configuration page, choose a running mode and then choose Next Step.
- Next, on the Review & Launch WorkSpaces page, choose Launch WorkSpaces. The initial status of the WorkSpace is
PENDING. When the launch is complete, the status isAVAILABLEand an invitation is sent to the email address that you specified for the user.
Step 3: Connect to the WorkSpace
After all, when you receive the invitation email, you can connect to your WorkSpace using the client of your choice. After you sign in, the client displays the WorkSpace desktop.
To connect to the WorkSpace
- Open the link in the invitation email. When prompted, specify a password and activate the user. Remember this password as you will need it to sign in to your WorkSpace. Note: Passwords are case-sensitive and must be between 8 and 64 characters in length, inclusive. Passwords must contain at least one character from three of the following categories: lowercase letters (a-z), uppercase letters (A-Z), numbers (0-9), and ~!@#$%^&*_-+=`|\(){}[]:;”‘<>,.?/.
- When prompted, download one of the client applications or, for Windows WorkSpaces, launch Web Access.NoteYou cannot use a web browser to connect to Amazon Linux WorkSpaces. For instance, if you aren’t prompted and you haven’t installed a client application already, open https://clients.amazonworkspaces.com/ and follow the directions.
- Start the client, enter the registration code from the invitation email, and choose Register.
- When prompted to sign in, enter the user name and password for the user, and then choose Sign In.
- (Optional) When prompted to save your credentials, choose Yes.
Next Steps
You can continue to customize the WorkSpace that you just created. For example, you can install software and then create a custom bundle from your WorkSpace. If you are finished with your WorkSpace, you can delete it.
To delete a WorkSpace
- Open the Amazon WorkSpaces console at https://console.aws.amazon.com/workspaces/.
- In the navigation pane, choose WorkSpaces.
- Select your WorkSpace and choose Actions, Remove WorkSpaces.
- For example, when prompted for confirmation, choose Remove WorkSpaces. The status of the WorkSpace is set to
TERMINATING. When the termination is complete, the status is set toTERMINATED. - (Optional) For example, to delete any custom bundles and images that you are finished with, see Delete a Custom WorkSpaces Bundle or Image.
- (Optional) Hence, after you delete all WorkSpaces in a directory, you can delete the directory. For more information, see Delete the Directory for Your WorkSpaces.
- (Optional) Above all, after you delete all resources in the virtual private cloud (VPC) for your directory, you can delete the VPC and release the Elastic IP address used for the NAT gateway.
Amazon WorkSpaces FAQs
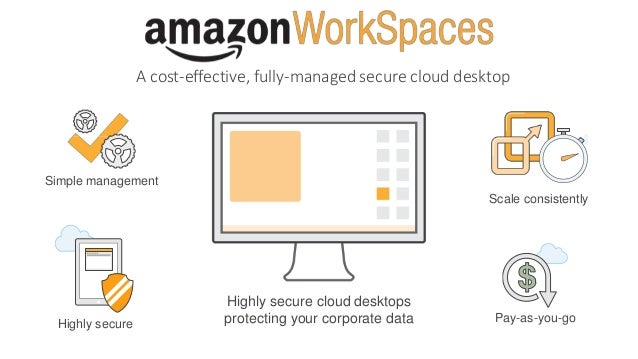
Amazon WorkSpaces is a managed, secure cloud desktop service. For instance, you can use Amazon WorkSpaces to provision either Windows or Linux desktops in just a few minutes and quickly scale to provide thousands of desktops to workers across the globe. Moreover, you can pay either monthly or hourly, just for the WorkSpaces you launch, which helps you save money when compared to traditional desktops and on-premises VDI solutions.
Moreover, learn more about our AWS Certification courses and DevOps Engineer E-Degree program