How To Create SERVICENOW Developer Instance
Introduction – How To Create SERVICENOW Developer Instance – Step by Step Tutorial
Automate workflows across your entire organization with a platform built for digital business. That is what ServiceNow is all about. Moreover, let’s dive deeper to explore hands-on on how to create a ServiceNow developer instance.
Basically, ServiceNow platform allows you to optimize processes, connect data and organizational silos, and accelerate innovation at scale. Hence, drive growth and reduce cost with the Now Platform.
Discover the benefits of the Now Platform
1. Connect your Enterprise
2. Discover Next Gen Experiences
3. Drive Workforce Productivity

4. Work Smarter and Faster
5. Accelerate Innovation
Basically, ServiceNow offers free, full-featured Personal Developer Instances (PDI) to registered users who want to develop applications on the ServiceNow platform or improve their skills with ServiceNow. New Developer Program members automatically receive a PDI running the latest release. Therefore, members of the ServiceNow Developer Program can use their PDI as long as there is activity on the instance.
How to obtain a personal developer instance?
Obtaining a PDI is fast and easy.
- Sign in to the ServiceNow Developer Site.
- In the header, click the Request Instance button.

- Moreover, select a ServiceNow release for the instance.
- Click the Request button.
- When the instance is ready, the Your instance is ready! dialog provides the URL and admin login details for the instance. Copy the Current Password to a safe location to use when accessing the PDI from mobile apps or integrations.
- Click the Open Instance button to open the instance in a new browser tab.
To open an instance from the Developer Site later, sign in to the Developer Site, open the Account menu, and click the Start Building button.
For more information about your PDI, refer to the Personal Developer Instance Guide.
Exercise: Obtain a Personal Developer Instance
Additionally, in this exercise, you will obtain and log in to a Personal Developer Instance (PDI).
IMPORTANT: If you already have a PDI, open the Account menu and click the Start Building button to log in to the instance. You can skip the rest of this exercise.
- In a web browser, open the ServiceNow Developer Site.
- Sign in with your email and password. If you are not currently a member of the ServiceNow Developer Program, create an account.
- Click the Request Instance button on the site header.
- Therefore, select Rome as the version. If Rome is not available, select any available previous version. After you obtain the instance, open the Account menu and select Upgrade Instance on the Developer Site to upgrade to the Rome version. NOTE: You cannot downgrade versions.
- When instance is available, the dialog gives the URL, Username, and Current password for the instance.
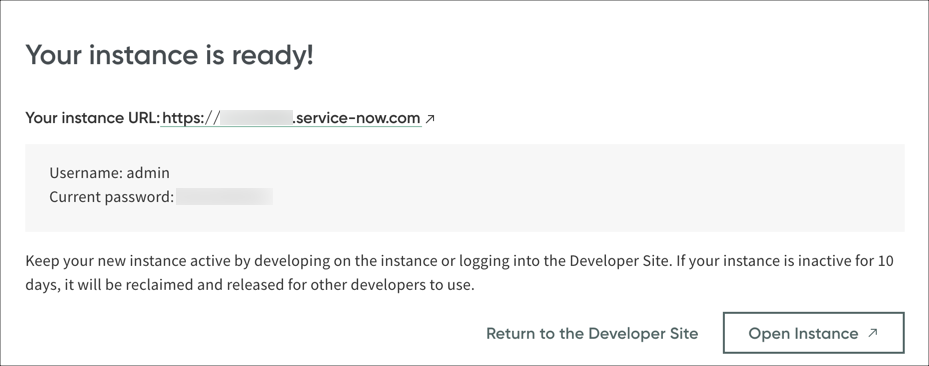
- Copy the Current password and save it in a safe location.
- Click the Open Instance button to open the instance in a new browser tab.
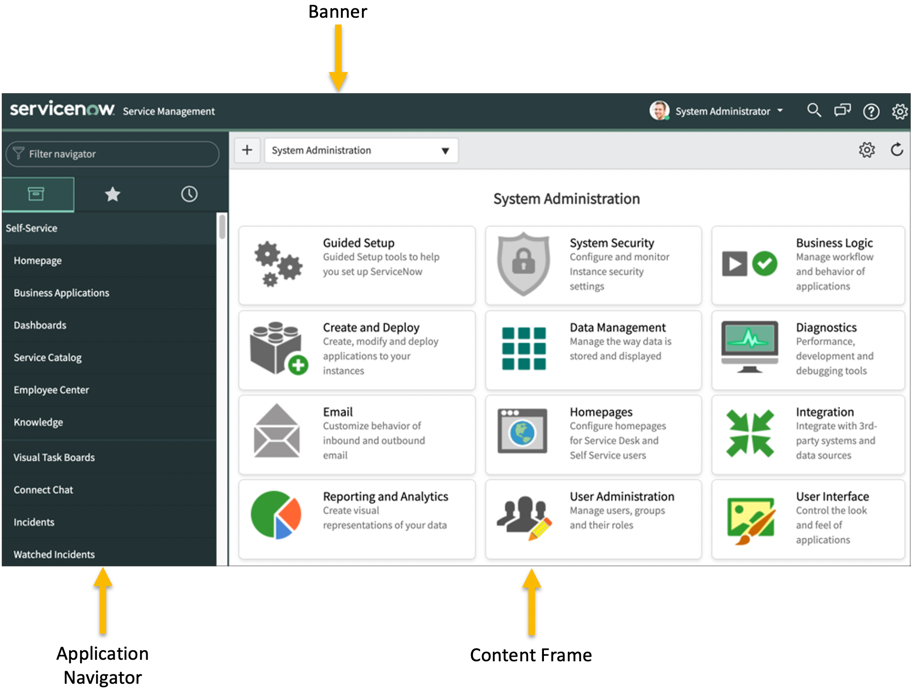
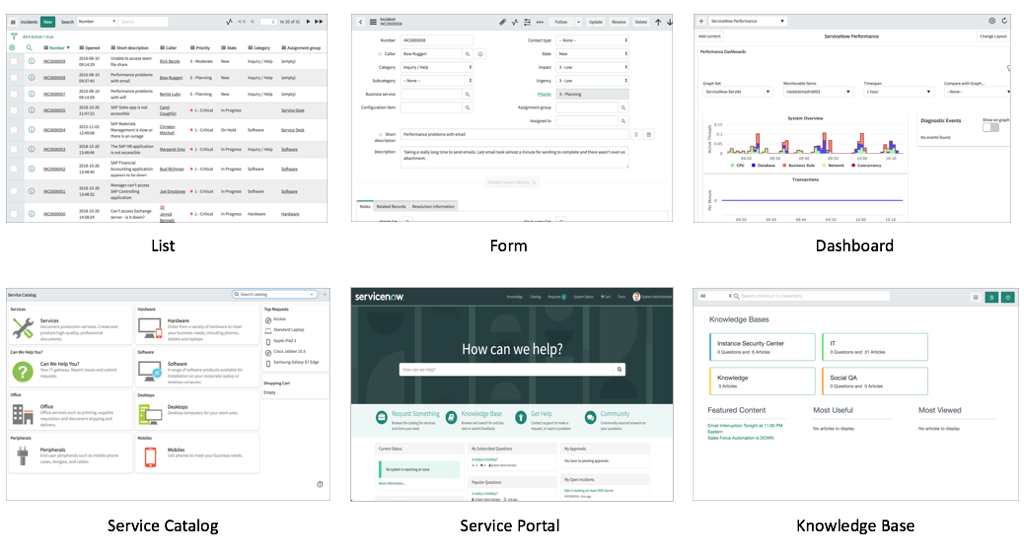
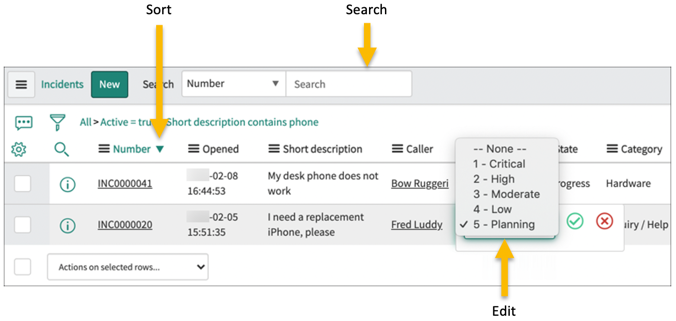
3 Components of ServiceNow User Interface
Conclusion
Thus, a well-defined DevOps pipeline ensures that each environment has a clearly defined purpose and that the application is deployed and tested in a consistent manner throughout the pipeline.
Want to learn web development? The Web Developer Bootcamp course by ClayDesk can be a great asset for your learning journey.